Everyone's been there...and then left. Been where? You know, that website that is soooooo slow. The "world wide wait." We've all attempted to visit a website that just seems like it takes forever to load. And a lot of the time you're waiting on images to load on the screen.
According to several studies, you have about 2 seconds to get a website to load before the visitor is ready to move on. Mobile users may give you a little bit longer, but as phone speeds increase, patience decreases with slow loading sites on a phone.
And because people prefer faster sites, it's also important to Google. Google has worked very hard to focus on things that are important to their users.
Website Load Time Affects More Than Visitors
Page speed has been a ranking factor in Google's algorithm for a while, but in 2021, it's an even bigger part of the ranking factor. (Read our blog for more about site speed: Industry Update: How to Prepare for Google's Core Vitals Update)
So how do you make sure your website is blazing fast and meets Google's requirements? Keep reading for more information one major area impacting site speed. And, take a look at our free guide to website must-haves.

What Causes Your Website to Be Slow?
Slow website load times can be caused by several factors so it's a little difficult to pinpoint one thing. It could be the software that runs your website (ie: WordPress), and/or the hosting server’s response time that's slowing you down. These are things often outside of a marketer's immediately control and will take a technical specialist to look into.

These are often beyond your immediate control. But there is one element of your site that you can definitely control to help speed up your website’s load time, and that's images. Google is actually looking to see if you’ve chosen the right types of files for use on the web so that your site will load as fast as possible.
When you optimize images for the web, you're reducing page load time and increasing site speed. Even if it's just a few milliseconds, that could be the difference between your site either gaining or losing countless website visitors. And you need those visitors so you can increase web leads.
Related Read: Website Optimization is More than Just Content
Why Does Optimizing Web Images Matter?
How do you know where to meet in the middle so that Google won’t penalize your SEO ranking but visitors can still view great images on your site?
When you click a link to visit a website, the server calls all of the files for the site to load on your screen. Depending on how your site is built, the images could account for the majority of the data that needs to be loaded. Because it can be such a major portion of what's loading (and what's slowing the site down), optimizing images for the web is one of the first things we do when we work with a client to improve site speed. The smaller the file sizes of the images, the faster a website loads.
But you don't want to end up with a grainy or fuzzy looking website, especially in the day of high-resolution screens, to be sure your site is optimized. Knowing what type of image to use is key.
When to Use Various Types of Web Images
Knowing the right file formats and how different formats handle different types of images can help you understand when and where to use the right file type to speed up your website’s load time and still produce good quality images. Understanding lossy and lossless compression are important in choosing the type of file format for an image that you want to upload.
LOSSY VS. LOSSLESS Image COMPRESSION
Images are optimized by reducing the data that an image contains, called data compression. Data compression is a technique in which the amount of data in an image is reduced without the loss of information. To do this there are two categories of data compression; lossy and lossless compression.
So what's the difference between lossy compression and lossless compression in images?
- Lossy compression uses inexact approximations and partial data discarding to represent content within an image. Some image file types, such as JPGs will interpret pixels of color and will reduce some of the information in the image, to reduce file size and still maintain as much of the images quality as possible.
- Lossless compression reduces the the size of an image file without sacrificing image quality. No data is lost using this method. PNGs are a good example of lossless compression.
"So wouldn't I just always use a PNG file type then?" That is a fair question. But, depending on the type of image, lossless compression could make a file much larger than it needs to be. Remember the goal in image optimization is to increase load speed for images being uploaded to your website.

Which File Type Do You Use for Web Images?
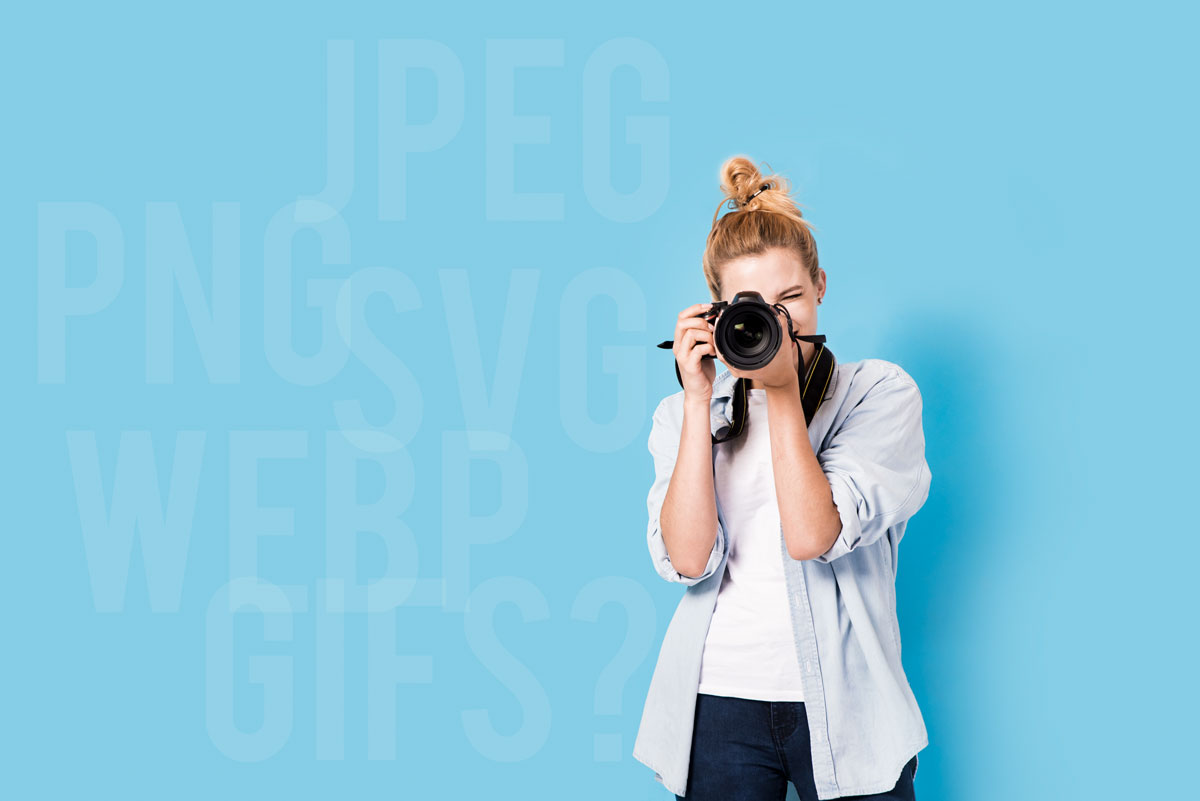
Currently, the majority of file formats being used on the internet are JPEG, PNG, SVG and WebP. Yes, there are GIF files too, but for creating great images for your website, gifs aren’t recommended. They have really been relegated to being used in animations in recent years and even then they are becoming less and less popular to upload to the web due to their size. We'll get to that.
JPEGs
JPEG (.jpeg sometimes seen as .jpg) files are best used for images that are shot with a camera or camera phone because the pixels of color within the image could use millions of colors. JPEG's do a great job of keeping the file sizes small even though many colors may be used within the photo. That's because JPEG's use lossy compression. They can combine some of those millions of colors, removing some information to make the file smaller, reducing the color palette used to create the image and yet still produce an acceptable quality for the web.
However, when optimizing a JPEG, you want to be sure the compression isn’t set so low that you see artifact leftovers in the image that muddle the quality of the image (see example below). And with retina (high) quality images being used for most devices these days, it's very easy to tell when an images quality is too low. Remember with JPEG's, the higher the compression the lower the quality. You need to be sure and strike a good balance between both when optimizing JPEG's for your website.
NOTE: If you have an iPhone image that came through as an HEIC file, you'll need to convert it over to JPEG format before inserting it into a web page. If you use a Mac, the Preview tool will allow you to export the HEIC in JPEG format. If you use a PC, here's an article that will give you some options.

PNGs
The Portable Network Graphics (PNGs) format is best used when you’re saving a graphic that has limited colors. Logos and icons are good examples of images that would use the .png file format. Simple graphics with a few colors can be saved as .png files to create high quality images with low file sizes that perfect for use on a website. In fact, the .png formats only purpose should be for use on the internet. It is not recommended to use PNG files for any sort of print purpose unless the dimensions of the image are pretty large. Pixelation will be obvious when printing a PNG unless the image dimensions are saved larger and printed smaller.
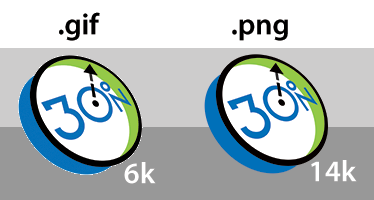
PNGs are also used when you are trying to create an image with a transparent background. No more artifacts around an image! For several years now, the GIF format has been going the way of the dodo. Extinct! That's because PNG's can handle transparency much more efficiently and with better results. Just another reason to stay away from GIFs!
The rule of thumb for using PNGs is if it’s a graphic with limited colors or the image needs to have a transparent background, use a PNG.
SVG
Before we talk about the SVG file type it's important to understand vector images. What is a vector quality image? Vector images are images that don't use pixel data but rather mathematical code-based data to create an image. Vector files have historically been used for all forms of printing because a vector image retains its quality regardless of size. A logo in a vector format can be printed on a business card and the same file can be used to print the logo on a billboard. The quality of the image will be perfect with no data loss at either size.
The SVG format is a format that provides web developers a way to use vector quality images. Most other file types used on the web are pixel-based (raster) formats that rely on whatever color information they contain at their specific size. For example, if you save a PNG file at 500x500 pixels at 72dpi (dots per inch), upload it to your website and then set the dimensions to 1000x1000 pixels, the PNG will lose some of its clarity. However, SVG images being vector-based, allow you to create images in any size and if through code you increase or decrease their dimensions on the web, don't lose any clarity. SVG's are commonly used for site logos or backgrounds that don't use many different colors. They are typically very small file sizes and help to increase load speed. Note, that older browsers may not support SVGs. That being said, all the latest versions of all the major browsers have basic SVG support.
WebP
You may recognize the WebP format if you've recently tried to save an image from the internet that you assumed was a JPEG or a PNG. WebP is a modern image format that Google created to provide superior lossless and lossy compression for optimizing web images. Google says that "WebP images are 26% smaller in sizes compared to PNGs. WebP images are are 25-34% smaller than comparable JPEG images at equivalent SSIM quality index."
WebP images also support transparency, so they provide the best attributes from JPEG and PNG formats at a smaller file size.
Sound too good to be true?
Currently there is one catch. Although WebP is supported in Chrome, Firefox & Edge browsers, it's notably missing from Safari. So if you only provide WebP images, no one on an iPhone will be able to see them.
The workaround is a rather technical hurdle to deliver WebP images to browsers that support them and then fall back to JPEG and PNG for anyone else. We've figured out a way to make this work, so if you want to squeeze every bit of technical SEO performance out of your site, we can help you out.

Should I use GIFs?
Avoid it like the plague! Leave them for animations that tell your story in the Slack channel. They're simply not high enough quality for the high-res screens of today.
"But what if I want to show an animated GIF?"
Did you know that Twitter actually converts uploaded animated GIFs to video files? That's right video files. Twitter converts any animated GIFs to video file formats such as MP4 to greatly reduce the file size. For example, an animated GIF uploaded to Twitter that is 1MB is converted to an MP4 file that is only 59kb! 94% smaller than the original uploaded animated GIF.
Even GIPHY, an online database and search engine that allows users to search for and share short looping videos with no sound uses MP4 video files.
The solution, if you absolutely have to use an animated GIF is to insert it as an MP4 file. There are plenty of tools out there than can be used for any platform you may be using.
How Big (or Small) Should Your Web Images Be?
There's no magical answer, unfortunately, as to a maximum size you should allow a file for use on the website. The hardest two files types to keep at a smaller size are PNG and JPEG.
JPEGs tend to be photos which nowadays are very large, high-resolution images that will print well at large sizes. We're talking several megabytes when they come off the phone or camera. That won't work for the website. There really should never be a time you take a photo straight from the camera or phone and load it to your website content management system -- unless you can resize inside of your CMS. In most cases you will need to resize the images to a reasonable web image before loading it up.
I recommend that for large images, such as those for a home page "hero" image, try to be at 200KB or less and even smaller if you have more than one hero image (rotating images). That should still give you a large enough image that will look good even on retina displays while also loading pretty quickly.
For smaller images, you could aim to be less than 20KB for most JPGs.
PNGs can be harder to make smaller, especially if you have a transparent background on a photo. But the size recommendations remain the same. If you can't make it in a reasonable size, you may need to talk to your web developer about another way to achieve the same thing without using that PNG.
How to Make Images Optimized for the Web
In most situations, you need to resize a JPEG photo that you have been given or that you’ve taken. Phones and cameras produce images that are several thousand pixels wide and several megabytes or more. And you may only need an image that’s several hundred pixels wide for a website. Typically, the maximum pixel width you'll need for a website is around 2000 pixels and only in those cases where you might be using it as a full-width display. Resizing the image to the sizes you need for the website before you upload is very helpful in optimizing your images for the web. Don't just download a large image from a stock photography site and uploaded it at its native size. By doing this, you are greatly reducing the speed at which a browser can load your images. That's the "anti-SEO image optimization" lesson for the day!
Adobe Photoshop is our go-to software for image editing. It includes options that allow you to produce good looking images that work well on the web, even retina screens, without creating large file sizes.
If you don’t have Photoshop there are some alternatives.
- If you use a Mac: Preview, included with your computer, will allow you to adjust the size of an image and the DPI (dots per inch) to get a smaller file size.
- If you use Windows: Paint comes with the computer and can be used for resizing.
Try to get any photos you’re using on your site to be 70KB or less, unless it’s a full width banner image where 200KB or less should be your goal. PNGs and SVGs should be in the 5 – 15 KB range but could be larger depending on the graphics size.
One Last Note on Web Image Optimization
Optimizing website images is one way you as a website owner, can help keep website load times as short as possible. A critical component of any SEO strategy should include image optimization for a faster website. Knowing when to use a WebP, a JPEG, a PNG or an SVG will help you to significantly reduce file sizes that you use on your website.
Also, remember to upload images at a reasonable size. Don't upload giant images that kill load time. The better optimized your images are, the faster your website. Oh yeah, and Google will like you better too. And who doesn’t want that?!